


 47
47
Scheduling an Event
First, open up your calendar
You can schedule an Event (meeting) by clicking the Create button in the upper left of the calendar, or single click on the day and time spot on the calendar (you can adjust the day and time if needed following). You can also click and drag across time and days to create larger event slots.
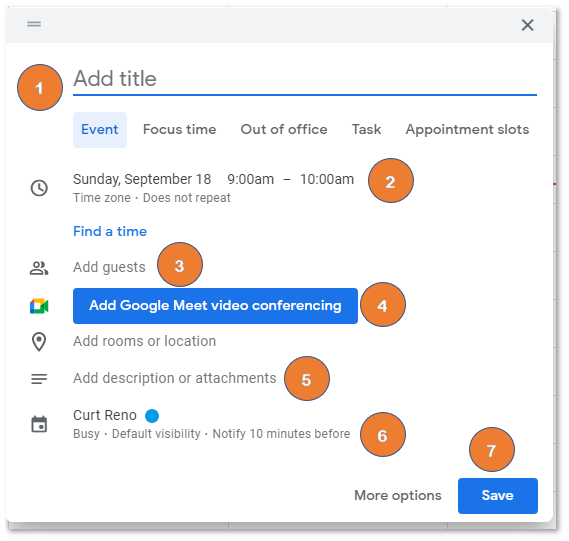
Figure: Event creation dialog box.
Event Entry
Type in your title (1) then choose/modify the day, start time and end time as needed (2). Click Add Guests (3) to invite others to the event or meeting. You can start typing the name for a directory when adding.
If you need a Google Meet, click the Add Video Conferencing (4) drop-down and select the meeting type desired. Google will provide the meeting link and it is available to all guests.
Add a description or attach a file as needed (5).
If you have access to multiple calendars make sure to select the correct calendar the event should appear in (6).
Make sure to Save (7).
Editing Events and Event Details
Double-click any event to see the expanded event details. This will show who is invited, who as RSVP’d, show the meeting link, and other details for the event.
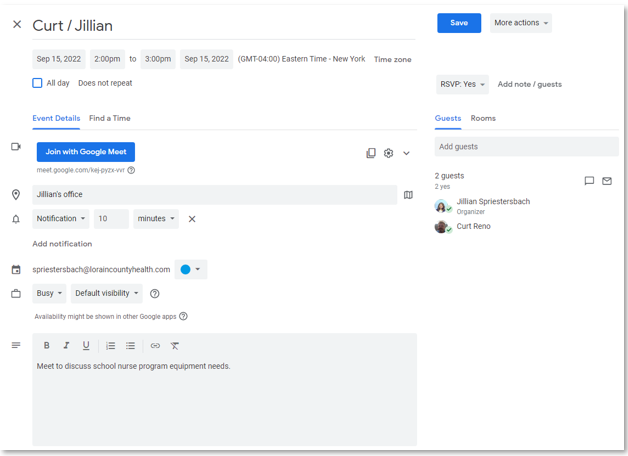
Figure: Event Details page.
Repeating Events
To schedule a repeating event, click the Does not Repeat drop-down menu under the date and time, then select the option(s) you need. Events can be repeated weekly, monthly, by day, or customized, as well as setting the number of meetings or start and end days.

Note: If you delete a recurring event, Google will ask whether you want to delete a single meeting or all instances of that recurring event.
Click Done to save.
Find a Time
Click the Find a Time tab when viewing the event details to view busy and free time of guests you have invited. You can then select an open time among guests, or suggest a time or day as needed.

Figure: Find a Time interface
Deleting an Event
To delete an event, click on the Event from the calendar to open the details, and select Delete.

